Sign-in - Register - Contact
 

Index of articles keywords


Archives per category


 Electric towel radiator recut / adaptation

The electric towel radiator is an essential accessory in a modern bathroom. There are many models of any dimensions and shapes. However, the basic models are between 90 and 120 cm high and may be difficult to integrate into a small bathroom. It is of course possible to buy smaller one but the price quickly becomes prohibitive.

Design of electric towel radiators or central heating one made of steel allows a DIYer to adjust the height.
However this address only to people who can make a good welding (ARC, MIG, TIG or oxy-gas). 

Note: if you use a brand new radiator forthis operation you will certainly loss the warranty, so it can be useful to test that heating is correct before modification.

This method can also be used for central heating radiator.

 
Materials needed:
  • metal saw
  • welder
  • angle grinder
  • paint

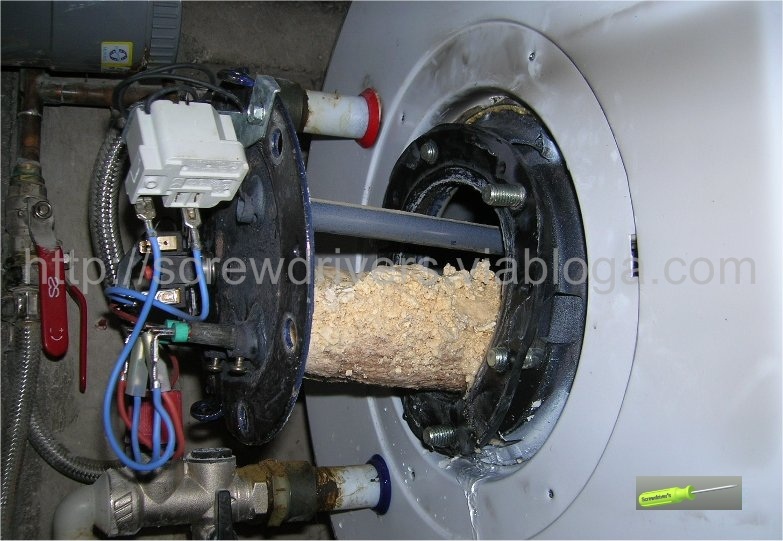
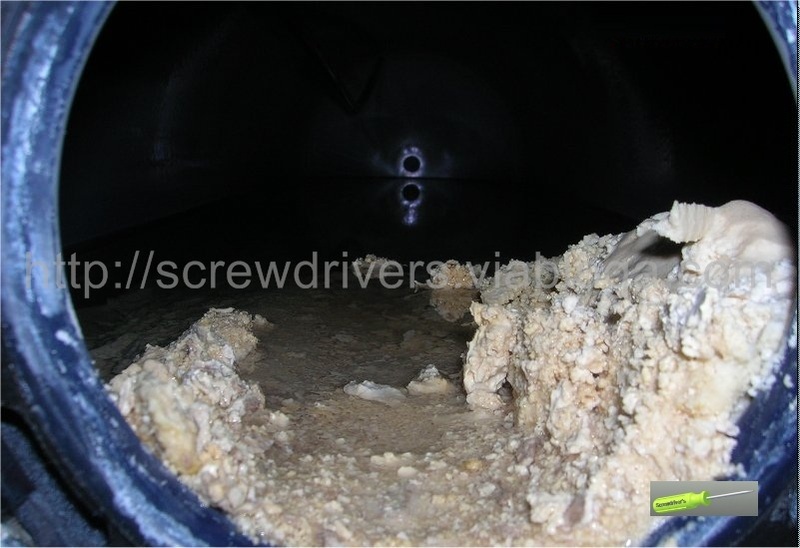
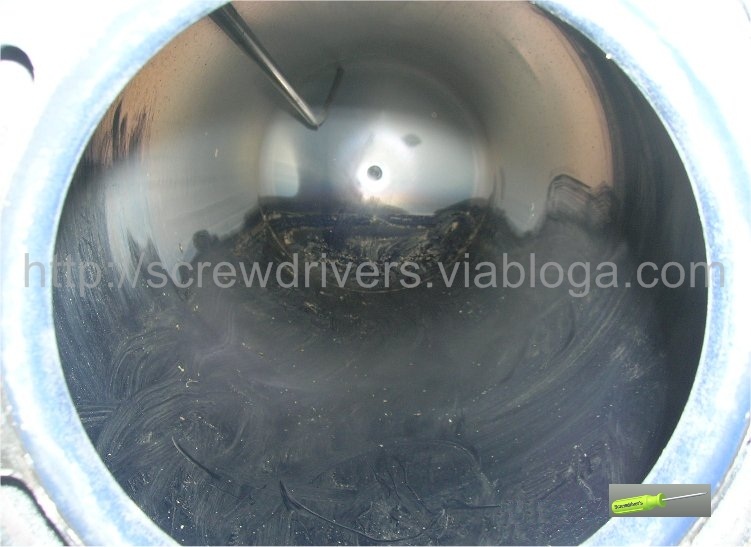
The first step is to drain the radiator and remove the electrical resistor in order to determine the heigth you can cut. (height reduction shall be limited to the minimum to maintain the efficiency of the radiator and prevent resistor to be oversized).

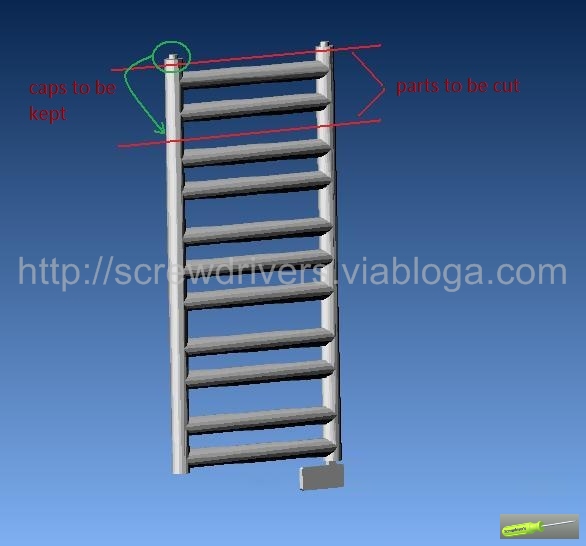
Then cut the two ends at about 1cm to keep for later the thread and caps. You can now cut the radiator to the desired length. Cuts should be clean and well perpendicular to the tube axis.
The most delicate operation is to weld back the caps on the radiator with no leak!. To keep original design you will have to grind the welds. If you have also cut the part with fitting for attachment you will also have to weld them to the top of the radiator.

To finish make paint touch-up on welds and fill the radiator with either the original liquid or car coolant.

 Install an automatic chimney (firebox) draught stabiliser

Firebox and stoves needs correct and constant draught to run well. If depression in the conduct is too high then fire regulation will be quite impossible resulting in heavy wood consumption and low comfort. Moreover if too high it will induce an uncontrolled reaction more the draught will be high, more the wood combustion will increase, inducing by the same more and more draught and so on...

Draught is determined by several factors as firebox type and mainly chimney conduct length and design. It can hardly been modified after built.

One easy to lower draught is to install and automatic stabiliser. This device is in fact very simple, a flap opens under depression and allows a certain amount of fresh air entering in the conduct. The opening regulation is made by use on a counter weight (more depression will be important more flap will open).
Fresh air has a twin effect lowering draught by the additional air amount but also lowering the conduct temperature and so the tendency of fumes to go upwards.

Several models are available on the market from simple model with a weighted flap and other more evolved with screw adjustable counter weight. For weighted flap model as presented on the picture the depression adjustment is made by turning the flap (more flap axle is vertical, more it will open quickly).

Best is to install this device during firebox installation, but if not you will still be able to add it after. For this you will have to replace the first tube of the conduct by a T section. Regulator as to be installed on a horizontal tube section. It must also be placed at a certain distance (at least 30 cm) from the main tube in order to avoid to be sooted by smokes (otherwise it would need often cleaning to work well).
Mechanism is simply attached on the pipe by the mean of two spring hooks that goes in tiny holes.
For finishing you can cut old conduct to correct length or install a new tube. Take care to attachment and sealing to avoid fumes to escape from tubing.

After installation you will need to test and adjust your draught stabiliser. Preferred method is to check with a vacuum gauge (this has to be done with a fire at running temperature) but if you don't have one you can adjust it step by step up to obtention of a good result. Caution : when adjusting do not open manually or remove the regulator from the pipe when there is a fire this could cause flashback. Adjust it carefully or proceed by steps when fire is extinguished.

If well adjusted you will notice improvement for fire adjustment and a lowered wood consumption. But remind that for optimal result always use dry wood and do not overload your fire place, this will not increase burning time.
This device can also be installed on fuel or gas boilers.


 Check efficency of your home insulation

House insulation is a key element for both comfort and also economy regarding heating (or air conditioning) consumption. Principal defect will be a lack of insulating material or thermal bridge between inside and outside resulting in colder area. An other defect could be a air leakage at door or window. This will result in loss of hot air and can also lead to other issues as humidity.

Professional control would normally need a thermal camera that will directly identify on its screen the difference of temperature showing objects in different colors from blue to red. But this type of material is very expansive or quite difficult to rent.

Beside you can do a good preliminary check in order to identify major defect using an Infrared Thermometer even if it will be less accurate.

These thermometer have a scan function which is very great for such type of application. You just have to hold ON the switch and then slowly move the laser pointer on the wall doors and windows. Measure may be done not too far from surface to locate colder areas. A distance of approx 1 meter will be great. Movement must be smooth and slow to allow thermometer measurement.

Special attention has to be taken near window, doors, wall angles, stairs floor and roof junction which are critical points. A defect in the center of a wall will normally nor occur except in case of really bad built. Take care also to internal walls between heated and non heated areas as garage cellar and so on.

Measurement will be firstly done inside house but an other check from the exterior could also be great to confirm or find other issues. Obviously such check will be done when there will be a sufficient difference of temperature between inside and outside otherwise it would not be representative.

Under picture illustrate a typical insulation defect :

This correspond of the under side of a cellar stair. You can see that on the left the temperature of the stair is at 17.5°C and just next to, on the wall temp is only 16.8°C. Wall temp correspond to cellar temp which is not heated, wile stair is hotter. This shows that part of the house temperature is leaking through the stair.

Depending of the result and the defect area several options can be foreseen as insulating material replacement or repair, addition of a seal or add an other layer.

 Install an ecological water saving hand shower head

Keywords :

Potable and drinking water as now became a key resource for environment.
One of simple gesture for your personal consumption could be installing a water salvage hand shower head. In addition of the gesture for the planet this will also benefit to your budget.

This new type of hand shower is now available on the market at a price quite similar to standard ones.


 How it works :

A conventional hand shower only let water pass through multiples littles holes. The water saving one is quite different in design : it includes internal mechanism that works with water pressure. Water flow enters in the hand shower, this pressure is used to aspire some air. Air is then mixed with water before going out. The fact to introduce air replaces a certain volume of water reducing global consumption.

Main advantage of this system is to keep same level of comfort for user. Shower sensation is quite the same than with normal shower head (you cannot notice if don't know that you use one).
We can estimate that water consumption is reduced by approx 30%.

Beside water consumption it will also reduce your gas or electricity bill of your boiler due to the fact that less hot water is used.

 How to descale your home electric water boiler / heater

Time after time scale deposit built-up in your electrical home hot water boiler. Consequence is an increase of electrical consumption due to the fact that scale prevent correct heat exchange and also a diminution of the boiler capacity due to the volume of the deposit. 

After few year of use descaling needs to be performed. Time interval will depend especially of the water hardness of your location. But it may be done each 2 or 3 years interval.

Obviouly you can try to use a chemical descaler but you will not be sure to have removed all the scale. Taking into accont quantity than can accumulate a lot of product will be needed. Then as such types of products are based on acids they are not really environmental friendly. Proposed method is to open the water heater for scale removal.

This operation is quite simple but requires some knowledge in electricity and plumbing.

The pictures are taken on horizontal water boiler but process and architecture is identical on vertical ones.

First operation is to cut electrical current of boiler with the circuit breaker. If you are not sure, cut the whole installation and/or check with a voltmeter.
Then cut the main water supply of the house.
Do not continue if these two operations are not made they are crucial for safety.

Note: you can stop electrical power one day before this will avoid to waist hot water and will lower the temperature inside for further operation.

Next open a tap to decrease water pressure (open hot and cold). When not more water comes out from tap, Then you can activate the safety group (little tap fixed on the boiler cold water pipe). Such operation may take some times as you need to drain completely the boiler. As an alternative you can disconnect inlet pipe to drain but you must anticipate how to evacuate water. Take care that water inside can be very hot.

When you are sure that boiler is empty :
- remove plastic cover that protect electrical parts and resistor, this is also the way to open the boiler.

- Disconnect electrical connection, draw a scheme or take a picture for reinstallation.

- Now remove nuts that maintain resistor element plate. This plate maintain resistors and plugs inside of the boiler.

- Carefully remove resistor plate, take care not to damage seal. If boiler is really scaled it could be difficult to extract resistor.

- You have now access to inside of your boiler. You should see heavy deposit of scale on resistors and in the tank. On vertical boilers major part of scale may exit alone. On horizontal ones scale will remain inside.

- Wash inside of the tank, you can use water vaccum cleaner and/or brush.

- Carefully clean resistors (or resistor tubes for steatite boiler type) with a metallic brush. Take care not to damage resistor surface.
- Check condition of resistor and anode. Anode may show some trace of corrosion (wear) but has to be strong enough to ensure protection of tank from corrosion.

- You can now reinstall parts. It is recommended to replace the plate seal to ensure correct sealing but if old one is in good condition it could be reused. 
- Put back the resistor plate and tighten the nuts. Process with one nut and then the opposite etc...
- Plug electrical connection and check water pipes. Also check that safety group is in good condition (button can be easily moved and it doesn't leak, if not replace it by a new one.

- Now you can re-open water supply and check that there is no leakage for the plate seal. Reinstall plastic cover and reconnect circuit breaker.